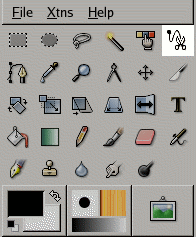
Gimp Tools
Learning the tools.
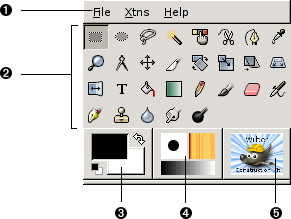
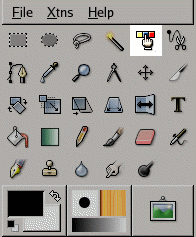
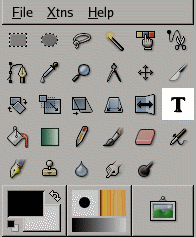
1.) Toolbox Menu: This menu is special: it contains some commands that cannot be found in the menus that are attached to images. (Also some that can.) These include commands for setting preferences, creating certain types of dialogs, etc.
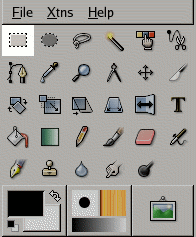
2.) Tool icons: These icons are buttons which activate tools for a wide variety of purposes: selecting parts of images, painting on them, transforming them, etc.
3.) Foreground/Background colors: The color areas here show you GIMP's current foreground and background colors, which come into play in many operations. Clicking on either one of them brings up a color selector dialog that allow you to change to a different color. Clicking on the double-headed arrow swaps the two colors, and clicking on the small symbol in the lower left corner resets them to black and white.
4.) Brush/Pattern/Gradient The symbols here show you GIMP's current selections for: the Paintbrush, used by all tools that allow you to paint on the image ("painting" includes operations like erasing and smudging, by the way); for the Pattern, which is used in filling selected areas of an image; and for the Gradient, which comes into play whenever an operation requires a smoothly varying range of colors. Clicking on any of these symbols brings up a dialog window that allows you to change it.
5.) Active Image: (This is a new feature in GIMP 2.2) In GIMP, you can work with many images at once, but at any given moment, one of them is the “active image”. Here you find a small iconic representation of the active image. Clicking on it brings up a dialog with a list of all the currently open images, allowing you to make a different one active if you want to. (Clicking on the window where the image is displayed will accomplish the same thing, though.)
The Rectangle Selection tool is designed to select rectangular regions of an image: it is the most basic of the selection tools, but very commonly used.
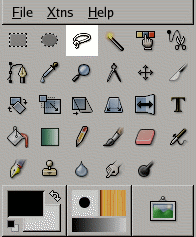
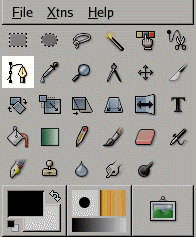
The Free Selection tool, or Lasso, lets you create a selection by drawing it free-hand with the pointer, while holding down the left mouse button (or, for a stylus, pressing it against the tablet). When you release the mouse button, the selection is closed by connecting the current pointer location to the start location with a straight line. You can go outside the edge of the image display and come back in if you want to. The Lasso is often a good tool to use for “roughing in” a selection; it is not so good for precise definition.
The Select by Color tool is designed to select areas of an image based on color similarity. It works a lot like the Fuzzy Select tool (“Magic Wand”). The main difference between them is that the Magic Wand selects contiguous regions, with all parts connected to the starting point by paths containing no large gaps; while the Select by Color tool selects all pixels that are sufficiently similar in color to the pixel you click on, regardless of where they are located. Also, clicking and dragging in the image has no effect on the Select by Color tool.


The GIMP Toolbox includes nine "brush tools", all grouped together at the bottom (in the default arrangement). The feature they all have in common is that all of them are used by moving the pointer across the image display, creating brushstrokes. Four of them – the Pencil, Paintbrush, Airbrush, and Ink tools – behave like the intuitive notion of "painting" with a brush. The others use a brush to modify an image in some way rather than paint on it: the Eraser erases; the Clone tool copies from a pattern or image; the Convolve tool blurs or sharpens; the Dodge/Burn tool lightens or darkens; and the Smudge tool smears.
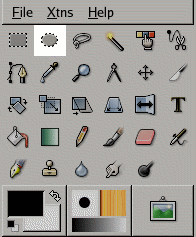
The Ellipse Selection tool is designed to select circular and elliptical regions from an image, with high-quality anti-aliasing if you want it.

The Crop Tool is used to crop or clip an image or layer. This tool is often used to remove borders, or to eliminate unwanted areas to provide you with a more focused working area. It is also useful if you need a specific image size that does not match the original dimensions of your image
The Fuzzy Select (Magic Wand) tool is designed to select areas of the current layer or image based on color similarity. It starts selecting when you click at a spot in the image, and expands outward like water flooding low-lying areas, selecting contiguous pixels whose colors are similar to the starting pixel. You can control the threshold of similarity by dragging the mouse downward or to the right: the farther you drag it, the larger the selected region. And you can reduce the selection by dragging upwards or to the left.
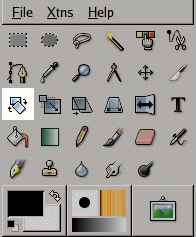
This tool is used to rotate the active layer, a selection or a path. When you click on the image or the selection with this tool, a grid or an outline is superimposed and a Rotation Information dialog is opened. There, you can set the rotation axis, marked with a point, and the rotation angle. You can do the same by dragging the mouse pointer on the image or the rotation point.
The Intelligent Scissors tool is an interesting piece of equipment: it has some features in common with the Lasso, some features in common with the Path tool, and some features all its own. It is useful when you are trying to select a region defined by strong color-changes at the edges.
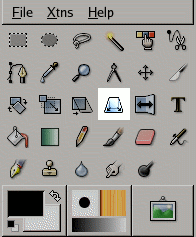
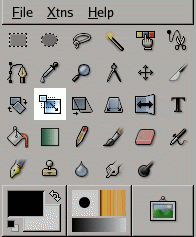
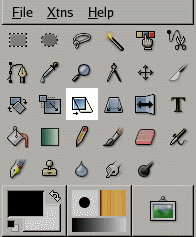
The Perspective Tool is used to change the perspective of the active layer content, of the selection boundaries or of a path.
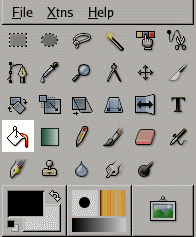
This tool fills a selection with the current foreground color. If you Shift+click and use the Bucket tool, it will use the background color instead. Depending on how the tool options are set, the Bucket Fill tool will either fill the entire selection, or only parts whose colors are similar to the point you click on. The tool options also affect the way transparency is handled.

The Flip tool provides the ability to flip layers or selections either horizontally or vertically. When a selection is flipped, a new layer with a Floating Selection is created. You can use this tool to create reflexions.
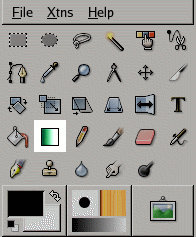
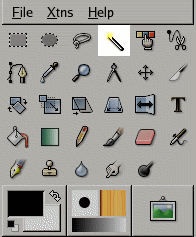
This tool fills the selected area with a gradient blend of the foreground and background colors by default, but there are many options. To make a blend, drag the cursor in the direction you want the gradient to go, and release the mouse button when you feel you have the right position and size of your blend. The softness of the blend depends on how far you drag the cursor. The shorter the drag distance, the sharper it will be.
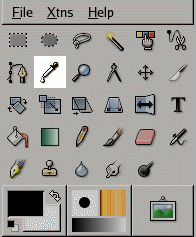
The Color Picker Tool is used to select a color on the active layer. By clicking a point on a layer, you can change the active color to that which is located under the pointer. The Sample Merge option lets you grab the color as it is in the image, resulting of the combination of all layers.
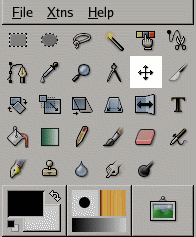
The Move Tool is used to move layers, selections or guides. It works also on texts. *******HINT*******:Holding down the space bar changes the active tool to Move temporarily. The Move tool remains active as long as the space bar is held down. The original tool is reactivated after releasing the space bar.
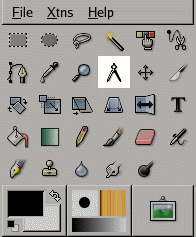
The Measure Tool is used to gain knowledge about pixel distances in your working image. By clicking and holding the mouse button, you can determine the angle and number of pixels between the point of click and where the mouse pointer is located. The information is displayed on the status bar or can also be displayed in the Info Window.
The Scale Tool is used to scale layers, selections or paths (the Object).
The Text tool places text into an image. When you click on an image with this tool the Text Editor dialog is opened where you can type your text, and a text layer is added in the Layer Dialog. In the Text Option dialog, you can change the font, color and size of your text, and justify it, interactively.
Shear tool is used to shift one part of an image, a layer, a selection or a path to a direction and the other part to the opposite direction. For instance, a horizontal shearing will shift the upper part to the right and the lower part to the left. A rectangle becomes a diamond. This is not a rotation: the image is distorted. To use this tool after selecting, click on the image or the selection: a grid is surperimposed and the Shearing Information dialog is opened. By dragging the mouse pointer on the image you distort the image, horizontally or vertically according to the the direction given to the pointer. When you are satisfied, click on the Shear button in the info dialog to validate.
The Path tool allows to create complex selections called Bezier Curves, a bit like Lasso but with all the adaptability of vectorial curves. You can edit your curve, you can paint with your curve, or even save, import, and export the curve. You can also use paths to create geometrical figures. Paths have their own dialog box:

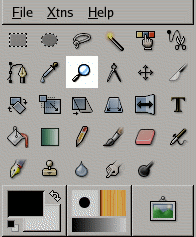
The Magnify Tool is used to change the zoom level of your working image. If you only click on the image, the zoom is applied to the whole image. But you can also click-and-drag the mouse pointer to create a zoom rectangle. Then, the action of this rectangle is better understood if the “Allow window resizing” option is unchecked: you can see that the content of this rectangle will be enlarged or reduced so that its biggest dimension fit the corresponding dimension of the image window (if the biggest dimension of the rectangle is width, then it will fit the width of the image window).