How To Make A Background

Welcome  Ask Who???? Ask Paca IMVU Secrets and Tweeks Gimp Walk Through How To Make A Background Gallery Favorite Links Guest Book

Backgrounds

Whats Good Mammis and Papis? So I thought if I was going to show you haw to make Avi's i hada come back through and show ya how to make a back ground to go wit ya new AVI huh? So Here we go, remember to visit the section explaing how to make the avi and the section that tells you all bout the tools. You'll need that before we get into this. I normally make my pics one of two sizes dependin on the effect I'm going for. 400 x 500 is the fisrt opption. I use this one when I don't want it to take up the entier back of my page or want to make it a tiled image. If I want it to take up the eniter background in my page with no border I use 1000 x 600.
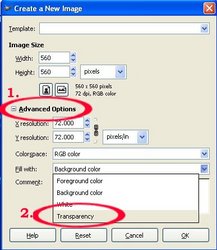
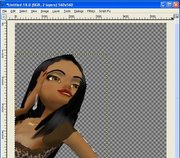
1.) The first step you'll need to make a new image and set it to transperency. If you don't see the option to make it transparent go to the "advanced" button to make the box enlarge. Choose transparent and ok it.

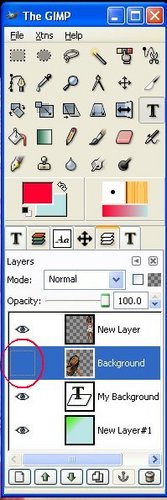
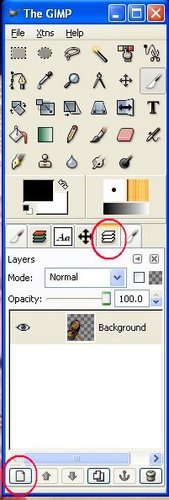
2.) Make sure to use your "Layers" tab shown in the first red ring. To make a new layer click on the new layer image at the bottom of the tool box indicated but the second red ring. By doing this you can insure that you don't loose the work you've done because of one little mistake. Each element should have it's own layer.

3. ) The next thing you need to do is get the pictuer that you took of your AVI, cleaned up and cut out to add to the transparent image you just created. (See the tutorial about AVI's to learn how to make a pictuer)

4.) You can hide or take away layers if you need to.This is what the image looks like with one layer hiden. As you can see you can't even tell the layer exsists. I always use my layers in order to keep from makin mistakes. If i mess up one element of the background I can always erase it, move it around, resize or any changes.

5.) Now the tool box will show you all the layers you have. You can even reposition the by clicking on the layer you want to move and draging it to the space you want it to be or useing the up and down arrows at the bottom of the tool box. To see what you image looks like with out one or more of you layers simply click on the eye next to the layer you wish to "hide". Notice the blue high light, this indicates the layer you are curently working on. You can't work on a layer if it isn't blue in the tool box.

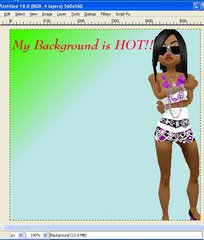
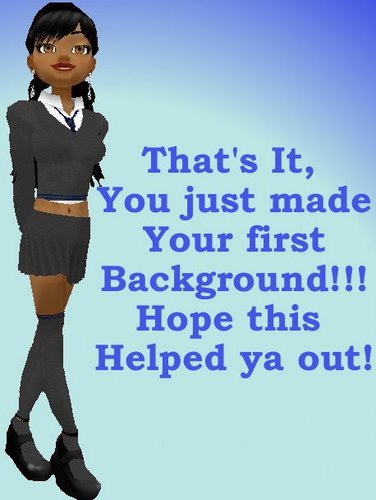
6.) This is the finnished out come. Of course if I was doing it I would add more stuff but I just wanted to give the very basic idea.

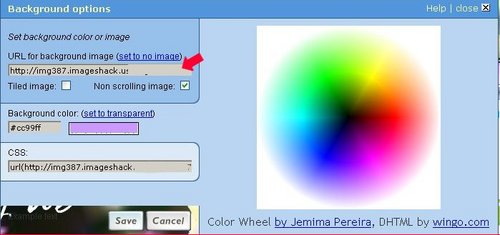
Next and last thing you need to do is to go to an image hosting site, you can find these by typeing "Image Hosting" in your serch engine. I have one in my Favorite Links section your welcomed to use. After you've hosted it using the one that reads http: copy and paste it in the section in you IMVU page at the top where it says edit under the blue header. The section indicated by the red arrow is where you paste it.

Don't for get to visit my Guest Book!!